How to Save Old Photos {free downloadable Instructions}


Whether you’ve got old photo formats from your past or you’ve inherited photos from previous generations, you’ve probably wondered how to save old photos. This downloadable 9-step tutorial will help you set your goals and get them organized.
This post may contain affiliate links, which means that I may receive a commission if you make a purchase using these links. As an Amazon Associate, I earn from qualifying purchases.
I recently ran across this question on Quora: “If one inherited many boxes of family photos, is it better to scan all the photos digitally or put them all into photo albums?”
Many of my clients ask me the same question, and when I cleaned out my parents’ home in 2015 after they both passed, I brought home many boxes of family photos to deal with later.
The answers submitted on Quora before mine were interesting—people were divided and pretty much only chose one answer, whether that was to scan them or not.
I was the first one who said: regardless of whether you keep them to put into albums, scan them to preserve them. And if you digitize them and get rid of the physical photos, you still should think about how you and others will enjoy them, otherwise, what is the point of scanning them?
Need some motivation or inspiration first? Read this article on why you may not be organizing your photos and why you should.
How to Save Old Photos
The thing is, for the most part, all old family photos right now are physical. They are in various states of organization, various states of decay, and various states of formatting. There are printed photos, slides, videotapes, and home movies on film. All are in danger from the ravages of time and environment, even if they never suffer a disaster such as fire or flood.
My daughter is over 30, and if I don’t get all those pictures I took in the last century digitized—let alone my parents’ collection—she’ll also be inheriting boxes of old family photos. I’m sure the thought of that makes her shudder in horror!

If you also have boxes of old photos, here is a 9-step plan to get you from photo chaos to photo peace.
As a bonus for joining my weekly newsletter, get this post as a free pdf that you can print out or save to your computer to refer to as you work on your photos.
STEP 1: START WITH THE END IN MIND
You want to create a vision for how you will use the organized collection. Some questions to ask yourself:
- Do I want to keep the physical photos and preserve them digitally, or do I want to convert to a digital collection and rid myself of the physical clutter? (There is no right or wrong answer to this question—only the right answer for you.)
- Do I want to make photo albums, scrapbooks, or photo books (real books you can hold created from digital photos)?
- Do I want to display some of these photos in my home—and if so, do I want to display physical photos in frames? Digital display frames? Canvas or other decorative prints?
- Do I want to use photos to make meaningful gifts for those I care about?
- Do I want to leave a legacy for my children and grandchildren? Do I want to preserve my family history and stories for future generations?

This vision for the completed collection will not only steer your decisions going forward, it will also maintain your stamina during what can be a long, drawn-out process. It is important to remember that your photos did not get into this condition in a weekend. You will not get them out of this condition in a weekend.
Another set of important questions to ask yourself
- Do I want to do all of it myself? Is there anyone in the family who can help me?
- Do I want to outsource all or part of it? Are there parts I will have to outsource due to equipment needs or specialized skills?
If you want to outsource all or part of it, I work with both local and long-distance clients. You can also look up other professional photo organizers at The Photo Managers website.
STEP 2: DESIGNATE AN ORGANIZING WORK SPACE
How long has it been since you started taking photographs? Since you last did any organizing or sorting? The point is, it took a long time for your photo collection to get into this condition. It will take a long time to fix it and you will need a decent-sized space to deal with it. This thought alone may be all you need to book a free call with me!
Choose a spot to work on this project—whether you tackle it in big or small chunks of time. You will need a flat surface on which to spread out, and your photo memories and tools will need to live here for a while. So, the kitchen table is not the best place, although a rarely used, formal dining room table may be. Make sure it’s a place that can be left undisturbed between sessions.
STEP 3: GATHER YOUR PHOTOS
Once you’ve created your vision and established your workspace, start gathering your printed photos. Here is a list of places to look that may not immediately come to mind:
- Attic
- Barn
- Basement
- Bookshelves
- Closets
- Dresser Drawers
- File Cabinets
- Fireplace Mantle
- Garage
- Jewelry Box
- Junk Drawers
- Kitchen Cupboards
- Lockers
- Mirrors
- Packed Boxes
- Photo Albums
- Picture Frames
- Purse
- Refrigerator
- Relatives’ Homes
- Safe
- Safe Deposit Box
- Scrapbooks
- Shadow Boxes
- Spare Bedrooms
- Storage Under Beds
- Storage Unit
- Tucked into other picture frames
- Undeveloped Film
- Wallets
- Work Desk or Bulletin Board
other things to consider when Figuring How to Save old photos:
- If you find negatives, hang on to them, especially if they are with the photos that were made from them. Negatives are the original photo and will yield a better scan than the prints, especially if the print has aged badly. However, this may cost more to get done. Do you have to keep them? I didn’t keep mine. Whatever feels right to you.
- Keep photo envelopes and notes that you find with the photos for now. These may yield clues about dates, people or events in your images that you will need once you start organizing.
- Don’t remove photos from albums or scrapbooks at this stage. There may be information along with the photos that help you organize them later. Sometimes it’s impossible to remove the photos without damaging them, so you can handle that later at the scanning stage.

STEP 4: GATHER YOUR TOOLS
You will need a variety of tools while working with your photos. Gather them together before starting your project and keep them in your workspace. Some you will have around your home, some can be purchased on Amazon or at other retailers, and some are best purchased from a reputable dealer in archival quality products.
Here are some things you will probably need:
- Dental Floss (for removing photos from sticky albums or scrapbooks—the waxed kind is less likely to tear photos that are really stuck down, in my experience)
- Label Maker (optional—if you are going to keep the printed photos – for labeling the divider cards)
- Dust rags
- Cotton or other lint-free gloves or Nitrile Gloves
- Rubber cement pickup eraser (for removing sticky adhesive residue without harming photos)
- Photo-Safe Cardstock, cut up, for labeling sorting piles
- Photo-Safe Stabilo pencils or pens for writing on the back of photos

The one product you do NOT want to use on your photos is any kind of sticky note. According to the Smithsonian Institute, “Conservation scientists at the National Archives and Records Administration conducted a battery of tests on Post-it notes and their competitors (hereafter referred to as a sticky note), and concluded that all sticky notes leave behind a harmful residual adhesive that attracts dirt and sticks to other papers or objects, no matter if you remove it immediately or leave it on for years, and the dyes in some sticky notes will run if wet.”
STEP 5: SORT AND IDENTIFY THE KEEPERS
To prevent becoming overwhelmed, start with small batches. You can also use a timer–maybe the Pomodoro Technique. Take frequent breaks. Don’t linger over photos—there will be plenty of time to enjoy them later.
The ABCs of photo organizing
Cathi Nelson, who founded The Photo Managers, developed a method she coined The ABCs of Photo Organizing. This is an especially good method if you plan to keep the printed photos and do something with them.
- A is for Album. These photos are the best and deserve to be displayed in an album.
- B is for Box. These are photos you still want to keep but need not go into an album. Be sure to store them in an archival-quality box.
- C is for Can. These are the photos you cull, the ones that are not valuable to you. More on this below.
- S is for Story. This is the most important part—does the photo tell a story? More on this below, as well.

four other piles to create
As you sort, you will come across photos you know you don’t want to keep. You may also come across photos you may want to keep, but you don’t recognize the people in them or the stories behind them. You may find damaged photos, and you may also come across duplicates and triplicates. Here’s how I recommend you deal with each of these:
- In the days of film, we took a lot of blurry photos and pictures of our fingers across the lens. There may also be photos of people who are no longer in our lives or family. If there is no other reason to keep such a photo (see below for decision-making questions), then put it in the C for Can pile for sure (or maybe just directly in the can!).
- If you come across a photo where you aren’t sure who is in it nor what story might be told by the photo, put in a To Be Identified pile. Later you can consult with other family members who may be able to help you figure out if the photo is a keeper.
- Is the photo a keeper, but it’s damaged by water, time, bad photo albums, torn, etc.? Put it in a Restoration Pile. I digitally restore photos and reprint them, and there are other places to have this done as well. It’s not likely you’ll want to pay to have the actual physical photo restored (only done by restoration specialists—think museum quality—and it’s very expensive), but you might.
- If you come across duplicates, triplicates, or even photos that are so similar to each other you don’t need them all, put them in a Giveaway Pile to disburse to family and friends later. They may appreciate seeing photos they’ve never seen before or reconnecting with memories they had forgotten about. They can always throw them away if they don’t want them! You can give them a copy of this article, too, in case they may want to organize their own photos.
Other questions to Ask
Here are some questions to ask yourself as you sort and classify each photo:
- Is it a good shot? If it’s not, does it have any historical significance (think buildings or landscapes that may have changed)? Is it the only picture you have of someone or something important to you (your baby’s first smile or your first car, for example)?

- Do you know who is in the photo? Do you WANT to be reminded of who is in the photo? And if you don’t, is there someone who will want to be reminded (children, grandchildren, etc.)?
- Is there an important story to the photo? Think not only of the story IN the photo, but the story BEHIND the photo. An example—you come across a photo of you and your best friend at a party in college. The party itself may not be significant, but that party is where you met your spouse the first time, and you don’t have a picture of that.
- Does it make you smile? Does it evoke any other emotion—nostalgia, wistfulness, etc.?
- Can you think how you might use it? Did you find a great picture of Aunt Polly that you think your cousins would love to have on a coffee cup or canvas print?
- Would future generations be interested in it? As I’ve worked with clients, I’ve seen so many interesting photos from their past ancestry—soldiers stationed in exotic locations during wars, formal portraits from the 1800s, familiar locations in less-developed conditions, etc. Although the younger generations say they don’t want our stuff—I think it’s not the memories they are rejecting as much as the physical clutter. They haven’t yet connected—or reconnected—with those memories. You can give them that chance.
Chronological or Thematic
Our tendency is often to want a chronological order to our old family photos, but this isn’t always possible, especially given the size and sometimes multiple sources of our photos. There are ways around this problem.
- You can sort by decades, if known. Again, there may be some guessing, but this can meet that need for a somewhat tidy timeline.
- You can sort a family by loose categories of age: early childhood, elementary school, middle school, high school, college, early adulthood, after kids, for example.
You can also sort by themes:
- People (immediate family, children, grandkids, parents, nieces and nephews, pets, etc.)
- Places (home, cabin, vacations—either all together as a category or separated by location; high school, college, work etc.)
- Events (birthdays, weddings, Christmas, Vacations, Graduations, etc.)
- Or any other theme that arises as you sort (parties, camping, children’s activities, etc.)

And within each theme you may find you can sort somewhat chronologically.
There is no one right way. Only the way that works for you.
This was a fairly short description of the sorting and organizing process. You can see a more detailed explanation (and download a cheat sheet) in this article.
As a bonus for joining my weekly newsletter, get this post as a free pdf that you can print out or save to your computer to refer to as you work on your photos.
STEP 6: TAKE GOOD NOTES AND LABEL EVERYTHING
As you take apart photo albums and scrapbooks, if you do that rather than have entire pages scanned, make notes about the photos you are removing. Look on the back to see if there are names or dates there. If not, but that information is written out somewhere, keep that information with the photo. If you plan to keep the photos and store them in boxes, take the time to write that info on the back in case the photo ever becomes separated from the collection. Use a Stabilo pencil or photo safe pen (Sakura is a good brand). Do NOT use a ball-point pen. Regular pencil is photo safe, but often smears or fades with time.
Make labels for your piles, whether you are sorting chronologically or thematically. Use photo-safe index cards or cut up archival quality paper or cardstock.

In a notebook write questions that pop up that other relatives may be able to answer. Or make notes about photos you know go together, even if you don’t have them all in your hands yet. You may notice that as you are sorting photos into a Parties or Celebrations theme, there are a LOT of Halloween photos. Maybe that needs its own category, but you aren’t sure yet. Make a note.
Take Note of Stories
If you come across a photo with a story behind it, write that down either in your notebook or on the back of the photo. Another example—before I sold my parents’ home of 40 years, I took a photo of the large pine tree in the front yard. I had graduated from High School early—at the end of the fall semester. My parents bought that pine tree as a living Christmas tree that year to commemorate my graduation and then planted it in the front yard the following spring.
So, the picture isn’t that great, but the story evokes emotion in me. It was one way my parents honored me. And I know there are photos of that tree as a Christmas tree, as well as over time as it grew. I just haven’t found them yet. (Yes, they are still in those boxes I brought home. The cobbler’s children have no shoes, right?)
STEP 7: DIGITIZE AND BACK UP
Whether you will keep the printed photos or not, you should digitize your collection for safe keeping and long-term preservation. For printed photos and slides, you can do it yourself or outsource it.
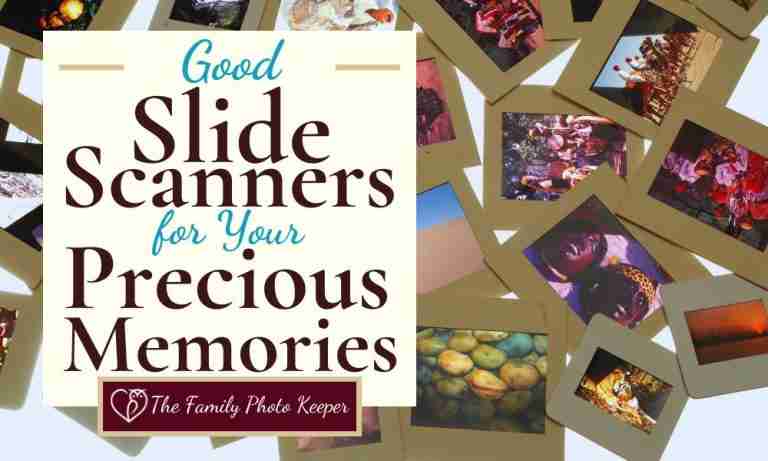
If you do it yourself, below are two scanners I recommend. If you have a lot of photos to scan, the FastFoto on the left is worth the money in the time it will save for you. If you’ll be scanning slides or negatives, the flatbed on the right can handle those. They are both made my Epson and are very high quality. Make sure you scan photos at 600 dpi, and slides or negatives even higher for the best quality.
Sometimes photos are stuck in albums or to the glass in frames, and it’s hard to get them on the scanner or to scan well. Or sometimes you may want to scan an entire album or scrapbook page and save that, vs each individual picture. For these jobs I recommend the Flip-Pal Mobile Scanner. It’s affordable, portable, and it comes with software to easily “stitch” together scans of larger items such as scrapbook pages or large photos. I’ve even heard of people using it to scan an entire quilt into a single photo!
If you have slides, you may want to outsource the job. I have a SlideSnap Scanner that quickly scans slides and crops them. Just like I do with photos, I run all scans through a color correction process to restore the original colors. If you find a Professional Photo Organizer through The Photo Managers, ask if they have a high-speed slide scanner.
STEP 8: MAINTAIN YOUR SYSTEMS
Once you have organized all your old family photos, you need to think about how you will keep your systems maintained. If you intend to keep your photos and physical items, invest in archival quality storage products. My favorite companies for high-quality, photo-safe supplies are Archival Methods and Gaylord Archival. Your photos, keepsakes, and other memorabilia will last for generations in their products.
For the photos you digitized, you need to come up with a maintenance plan, since you probably also have quite a number of digital photos and videos that you need to organize (to be covered in a future blog post). I offer maintenance packages for my clients, but you can make a schedule for yourself to add new photos to your collection and set aside time to organize them.

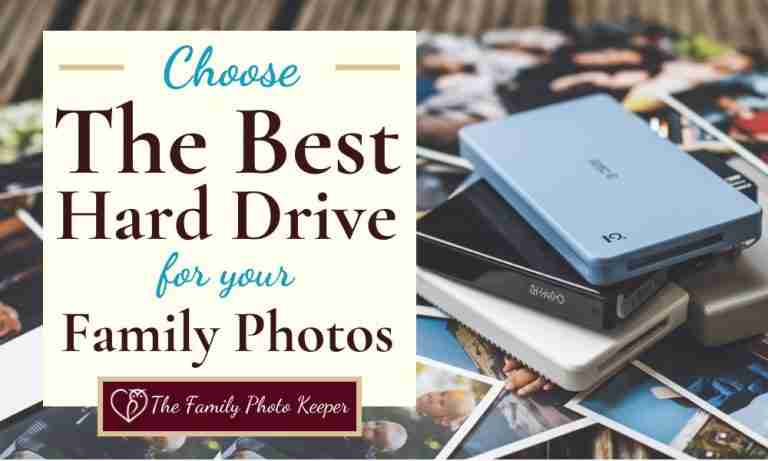
If you store your digital files on hard drives, make sure you have additional copies of them. Experts recommend the 3-2-1 backup rule—1 original set plus 2 copies of the files, on at least 2 different devices, with 1 being offsite. Cloud-based storage like Forever can count as offsite, and if one of your devices is your computer, then a backup service such as BackBlaze or Carbonite that makes a copy of all your data is an affordable option.
Another option is to store an external hard drive at work, in a safe-deposit box, or at a relative’s house not near your own (although if you make changes or additions to your collection, you must remember to get that hard drive and update the copy there). In addition, you should replace your hard drives (and flash drives) about every 5 years. I do not recommend CDs or DVDs as a permanent storage option, so I don’t count those in the 3-2-1 rule.
STEP 9: ENJOY, SHARE AND CELEBRATE YOUR MEMORIES
This is the prize and the reason for going through the whole process! Start with these ideas:
- Make a photo album, scrapbook, or photo book to keep in your living room so you can enjoy it often. Choose photos that cover a time period or are from an event, or even a series of events such as vacations. Make sure there are plenty of shots of the people you care about in them. You can also create photo-based home décor or get a digital frame that rotates through photos. Your old family photos can have new life!
- Share your digital photos with friends and family. You can do this through email, on social media, or even from some cloud-based storage sites like Forever. You can also share them by making personalized photo gifts for those you care about. These are great for birthdays, graduations, Mother’s Day, Christmas—any gift-giving occasion.
- Celebrate your memories by creating slide shows from your photos, tribute books and photo displays, etc.

Make sure you check out my training:
Timeless Treasures: A Comprehensive Guide to Organizing and Preserving Your Printed Photos